A few days ago I ordered a new computer to replace an older one we had in our office. To go along with this project, I decided to see how it would be to install ubuntu from scratch on a brand new computer.
Here's the specs:
Intel Pentium Quad Core 6700
ASUS Motherboard
4 GB Ram
NVidia GeForce 6400 video card
an old 200GB hard drive I had lying around, as well as a DVD burner, a multi-card reader, and a 19" display from the computer I was replacing.
I built this from the ground up (yes, I know - I'm a geek). On my laptop, I downloaded a fresh copy of ubuntu 8.04, and burned it at the slowest speed it could.
After assembling the hardware, I plugged it in, and put in the Install CD.
Immediately, it came up, and asked if I wanted to run from the disk (live CD) or install.
Since I was planning on a full install anyway, I opted for install.
A few clicks (what language, timezone, keyboard, how I wanted to use the existing drive) it started to format the drive and copy the files.
Everything went pretty smooth, but after a few minutes, it seemed to hang on copying the files (30% done). I stepped out for a little bit, and returned to see an error message. It seems that it recognized there was a problem, and asked what I wanted to do.
Ok, so I'll restart, and see if my disk didn't burn properly. I opted this time for the "Try Ubuntu". No problems, booted right up. Everything worked - sound card, video card, networking.
When you do the live cd, it has a link on the desktop to install. I double clicked, and away we went. This time, no problems.
After about 10 minutesit told me I could reboot at any time. I could continue to work, but it wouldn't save anything (since I was running from the CD). A quick restart, and we're off.
First thing, it always checks for updates. All told there were about 170 updates available. Simple to do, click on the update notification, hit "Install updates". About 10 minutes later, it's all installed.
It shows a little card icon, saying that there are restricted drivers that can be used with my graphics card. No problem, they're available, just click "enable restricted drivers". What this means is that ubuntu doesn't create them, the manufacturer does. Not a big deal, but if there's a problem, some manufacturers can drag their feet with fixing it. Usually (as in this case!) there are no problems.
Now, I want to put some of my more commonly used tools on here.
Bibble Pro is my conversion software of choice, as it runs natively on linux, so I head to their website. http://www.bibblelabs.com
A note for those new to ubuntu - you'll want to look for .deb installers. Ubuntu is a derivative of debian linux, so that is the native installation program. A few clicks, and I have the trial version of Bibble Pro downloaded and installed. Sweet.
Next, I really like picasa for some of my more basic editing. A quick google search of "picasa linux" brings me to the right page. Again, I download the .deb file, and I'm off and running.
Next, I have some fonts that I use quite a bit. From experience, I know that "Font Python" is a great program for handling all my true-type fonts (TTF), and that's in the repositories (the ubuntu warehouse of software). Hit "Applications->Add/Remove..." and in the search box, type "Font Python". Found it, add a checkbox.
While I'm in there, I'm going to search for Scribus - an open source version of Adobe InDesign. Type in Scribus in the search box, add another check, and voila.
Finally, I use "GLabels" for my cd label creation. Again, just search for "GLabels", click the box, and I'm done.
A few other ones I installed:
DeVeDe - a great little DVD (video) burning program
UFRaw - a raw plugin for many different programs
Now I hit "Apply Changes", and the program automatically downloads and installs the programs I selected.
Ok, so that's about everything.
Sort of.
Since I'm not exactly a newbie, I know there are a few things that are available, but not exactly obvious. It really makes everything much nicer though.
Here's how to get to some of the goodies:
Software Sources: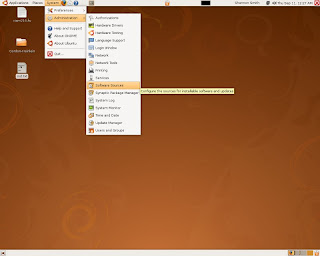
Pretty straight forward here. Hit "System->Administration->Software Sources".
You'll get a window like this:
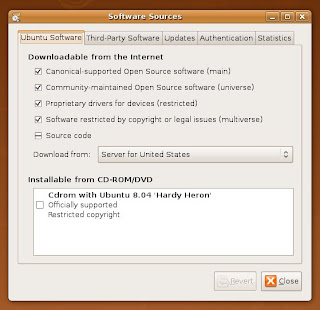
You'll see that I have everything checked. Make sure yours is too. This enables the "multiverse" and "restricted" sources, that have much more in them.
Next, I hit the terminal. If you've ever seen a dos prompt, this is exactly the same thing.
Don't freak out, it's really easy.
Really.
To get to a terminal, hit "Applications->Accessories->Terminal"
You'll see a window that looks like this:
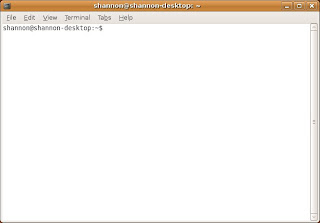
Nothing scary. Of course, it will be your name, rather than mine. :-)
Ok, so before we more forward, a note of caution (of course, right after I tell you it's not scary! LOL) The terminal has lots of power, and you have to read things. It's not going to give you pretty stop signs if you're about to screw everything up. If something pops up on the terminal screen, read it!Ok, now we're back. a quick lesson in terminal speak:
sudo means to "run this next command as the root user". Root user can change pretty much anything, including system stuff. It also lets you install programs.
apt-get is the command line installation program. It always has to be run as root, so usually you see it typed like this: "sudo apt-get"
It looks for some commands (what to do). For now, we'll just stick with two:
install ____________ (install the program named ____________ )
remove _____________ (remove the program named ____________)
Pretty easy, huh?
Ok, I shoot in raw, so I want to be able to see the thumbnails when I open up a folder. To do this, there's a nice little program called "gnome-raw-thumbnailer".
So, to install it, we type:
sudo apt-get install gnome-raw-thumbnailerNow something will happen. Don't freak out, it's supposed to. Here's what I got:
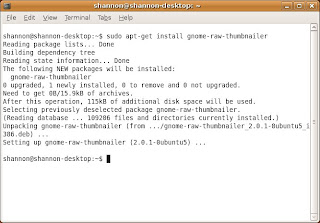
Yours may look different. It may say something to the effect of "This will take an additional __MB of space....do you want to continue (Y/n)?"
if so, the capital "Y" means if you just hit enter, it will assume you mean "Yes". Y, Yes, or just enter are all accepted as yes. Mine looks different because I removed it, and re-installed it just for the screenshot.
Now it won't actually show thumbnails until you restart. It doesn't say that (it should!) and it drove me nuts for a few minutes before I figured it out. Go ahead and restart, and you'll be able to view your raw images like they were jpgs.
Cool huh? (Vista doesn't even do that yet! LOL)
Anyway, more later. I just wanted to share getting started.
Shan


